The secret to a deep shine? It’s all about the quality of the finish rub.

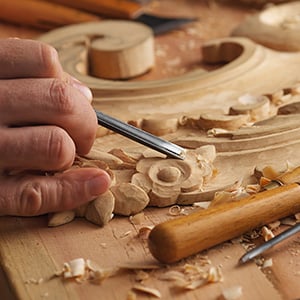
In woodworking artistry, the beauty is found in the details—the carved cuts, the wood grain, the final gleaming finish. A fine pumice grit—like Sedoso™—makes that beauty possible.
BUY SEDOSO™
The Rub: Going from Average to Amazing
The final micro-sanding and rubbing steps in finishing wood (or metal) is what takes the quality of a piece from average to amazing. Liquid finishes, whether applied with a spray gun (micro-bumps) or brush (drag ridges), never cure perfectly flat. And then there are those dust motes drifting down and rooting into the curing surface. Rubbing up the finish with a superfine abrasive knocks down those flaws and greatly improves surface appearance, especially when lit.
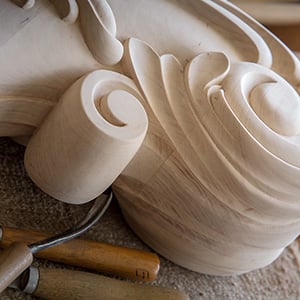
Smoothing Intricate Detail: Shaping the Cut and Protecting the Edges
For smoothing flat surfaces or wide curves, sheeted sanding media gets it done. But when the cut details get tight and intricate, a loose sanding grit pushed around with felted cloth backed by whatever-fits-the-shape provides incredible control, preserving the defining edge transitions and confining the cutting and smoothing to where it belongs.
The Nitty Gritty
FULL CURE: Allow for a complete cure—the complete absence of solvent smell—before rubbing the finish coat(s). Some finish formulations take longer to cure than others—some varnishes, for example, should be left to cure for several weeks. Finish experts advise at least 3 coats of a film-building type finish, but coat-count depends on several factors, including the porosity of the wood, degree of finish thinning, and thickness of application.
LUBRICANTS: The use of lubricants with Sedoso™ finish grits controls the cutting rate—dry grit is the most aggressive. Use the right lubricant for the finish chemistry type. For example, do not use mineral spirits on water-based finishes.
THE STROKE: Use long straight strokes that track with the grain of the wood. Maintain an even pressure. Seek expert advice on rubbing techniques to avoid rubbing through the finish on the corners. And this: let the grit do the work, not application pressure, which cannot be held consistent.
REMOVE THE DUST: Before applying a finish coat, remove the pumice and cut-material dust. If blowing off, allow a generous amount of time for the dust to settle. After blow-off, brush-off, or vacuum-off, wipe surface with a clean, lint-free cloth dampened with water or mineral spirits. Tack clothes work too. Match nature of wetting compound to finish type. Repeat as necessary, rotating to a clean cloth surface often to avoid redepositing dust.
APPLICATORS: Use felt pads, cotton cloth, and cotton string or rope (various diameters to work valleys on lathe-turned pieces). When possible, wrap the applicator around a stiffener to even out pressure consistency.
A PROGRESSIVE PROCESS: Various sanding and finishing grit grades are available because the most effective way to get to the desired level of visual smoothness and gleam is to work through progressive grits, with the coarser grits doing the leveling and blemish removal, and the finer grits erasing the scaring left behind by the coarser stuff.
| SEDOSO™ GRADE SIZE to EQUIVALENTS | ||
| SEDOSO™ GRADE | MICRON | OTHER |
| SEDOSO X2 | 24-28µm | (FF) |
| SEDOSO X3 | 22-25µm | (FFF) |
| SEDOSO X4 | 16-18µm | (FFFF) |
| SEDOSO XRS | 12-14µm | (ROTTENSTONE) | NOTE: Mean (average) micron size range is determined via laser diffraction. Pumice dust is non-spherical in shape, so sizes are approximate, with the degradation in accuracy becoming more pronounced in the larger particle sizes. |
SAY IT: Pronounced say-doe-so. Sedoso means “silky” in Spanish.
ADDITIONAL INFORMATION and SUPPORT DOCUMENTS
 Technical Data Sheets: the physical and chemical properties of pumice from the Hess deposit is found on page two of the Sedoso TDS, linked in the order blocks below).
SDS: Pumice Safety Data Sheet (PDF).
Certificate: Non-Expiration (PDF).
Declaration: Non-Crystalline Silica (PDF).